Custom Logo Hardware for Luxury Handbag Brands: Four Routes, the Depth and Stroke Figures Behind Them and the Checklist Before the Die
A logo on metal is not a logo on paper. It is a relief with a depth, a minimum stroke width, a draft angle and a placement tolerance, and each of those four numbers decides whether the mark reads as a house signature or as a smudge at the corner of a lock. Four routes exist: struck from a steel die, cast into the fitting, chemically etched, or laser marked. They differ on depth, on legibility, on tooling time and on what they cost per piece, and they are not interchangeable. This piece sets out the four side by side, gives the design rules a logo has to satisfy before it can exist in metal at all, sets the figures for depth and stroke, and closes with the checklist to complete before the die is cut, because after that point a change costs the tooling rather than the drawing.
What Branding on Metal Has to Survive
A logo on a fitting is read at arm's length, in three dimensions, under shop lighting that it did not choose. That is a harder set of conditions than a logo on a card or a screen, and it rules out a surprising amount of artwork.
Three properties decide whether the mark works. Depth, which governs whether it casts a shadow and is therefore visible at all. Stroke width, which governs whether the finest part of the artwork survives the process. And draft, which governs whether the part comes out of the die without the relief being dragged.
Artwork that has only ever existed flat usually fails the second of these. A hairline serif at 0.1 mm is perfectly legible on a screen and disappears entirely in metal, so the first step is always a redraw rather than a file transfer.
The Four Routes to a Logo on Metal
Every branded fitting uses one of four routes, and the choice is made on depth and durability first and on cost second.
Struck from a steel die
A hardened die presses the mark into the fitting under load. Relief of 0.30-0.60 mm, crisp arrises and the preferred route for a house signature on a lock or plate.
Cast into the fitting
The mark is machined into the die-cast tool, so it appears on every shot with no second operation. Relief up to 0.80 mm, the deepest of the four, and the only one that adds no per-piece step.
Chemically etched
A resist protects the surface while acid cuts the exposed mark. Depth of 0.10-0.20 mm, soft edges, and the right choice for a fine monogram or a repeating pattern.
Laser marked
A beam removes or discolours the surface. Depth of 0.02-0.05 mm, no tooling at all, and the route to use for a batch code or a market-specific mark rather than a signature.
The last route is often misused. A laser mark is shallow enough that it disappears under a plated layer and under a season of handling, so it suits identification rather than identity.
Design Rules: What a Logo Can and Cannot Be in Metal
A small number of geometric rules settle most of the redraw work, and they are worth applying before anything is sent to a toolmaker.
- Minimum stroke width: 0.15 mm for laser, 0.20 mm for a struck die, 0.30 mm for cast. Below those figures the finest stroke fills in or breaks up.
- Minimum letter height: 1.5 mm to be legible at arm's length, with 2.0 mm preferred for a capital at the centre of a lock face.
- Internal corner radius: 0.20 mm minimum. A sharp internal corner chips the die and rounds off within the first hundred shots.
- Draft on raised relief: 3-5 degrees, so the part releases without the relief being dragged across the tool face.
- Counter shapes: keep them open. An enclosed counter in a cast mark traps metal and fills.
Letter spacing is the one rule most often ignored. A tight tracking that looks elegant on a page produces strokes that merge once the relief is formed, and the only remedy is a wider spacing than the brand guidelines specify.
Depth, Relief and Legibility: the Numbers
These are the figures to write onto the drawing, and they are the ones a toolmaker will ask for first.
- Struck relief depth
- 0.30-0.60 mm, with 0.45 mm a good default on a lock face
- Cast relief depth
- Up to 0.80 mm, the deepest available and the best in low light
- Chemical etch depth
- 0.10-0.20 mm, with soft edges that suit a monogram
- Laser mark depth
- 0.02-0.05 mm, which is why it does not survive plating well
- Logo area on a lock face
- 18 x 12 mm carries three to five letters comfortably
- Placement tolerance
- ±0.30 mm from the stated datum, with rotation held to ±1 degree
Depth and plating interact. A plated layer of a few micrometres will not fill a struck relief of 0.45 mm, but it will soften an etch of 0.10 mm noticeably, which is why etched artwork is approved after plating rather than before it.
Where the Logo Should Sit
Placement is a decision about sightlines rather than about available space. A mark that is technically well made and never seen is a mark that was wasted.
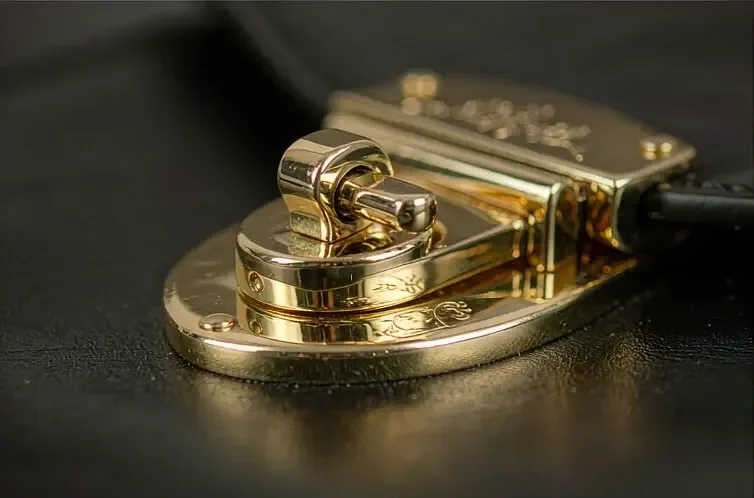
- The face of a twist lock: the highest-value position on a structured bag, because the hand goes there every time.
- A plate on the front panel: the traditional position, but it competes with the leather and needs a deeper relief to register.
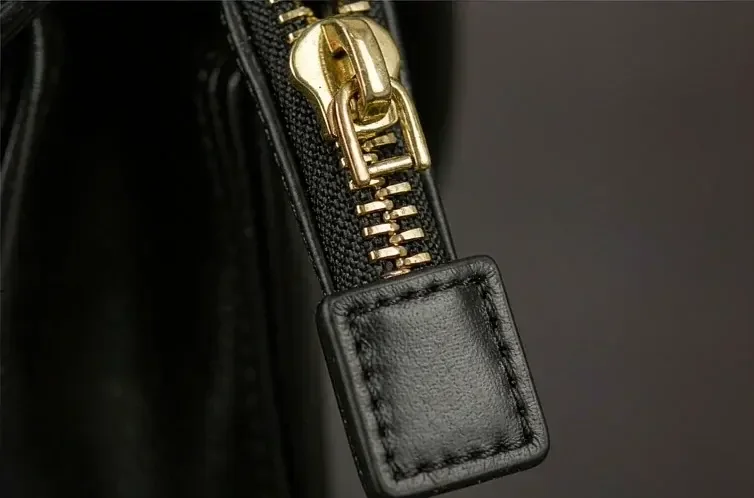
- The zip puller: small, handled constantly, and best carrying a mark rather than a full wordmark.
- The underside of a strap end or a D-ring plate: a quiet position that rewards the customer who looks, and photographs badly.
- A foot or the base: avoid. It is abraded continuously and the mark will be gone within a season.
One mark per bag is usually enough. Two marks on a single silhouette, on the lock and on the plate, read as insecurity rather than confidence, and they double the tooling for no gain in recognition.
Checklist Before the Die Is Cut
This is the page to complete before any tooling is commissioned. Every line here is inexpensive to change now and costly afterwards.
Ten lines before tooling
- Artwork redrawn in vector form, with all strokes at or above the minimum for the chosen route.
- Route chosen on depth and durability: struck or cast for a signature, etched for a monogram, laser for a code.
- Relief depth stated in millimetres, with a draft angle of 3-5 degrees on any raised relief.
- Datum named and placement tolerance written as ±0.30 mm with rotation at ±1 degree.
- Logo area confirmed against the fitting: 18 x 12 mm carries three to five letters.
- Finish specified, and the artwork approved after plating rather than in the raw state.
- Production quantity confirmed at 500 pcs per style and colourway.
- Tooling time accepted: 8-12 days for a brass stamp die, 15-22 days for a hardened steel die.
- Per-piece cost accepted: striking at USD 0.08-0.20, laser marking at USD 0.05-0.12.
- Ownership of the die agreed in writing, along with what happens to it between seasons.
Tooling, Lot Sizes and the Calendar
Branded hardware adds a tooling step to the calendar, and the step is longer than most first collections allow for.
| Element | Struck or cast | Etched | Laser marked |
|---|---|---|---|
| Tooling | Steel die, 15-22 days; brass stamp die, 8-12 days | Artwork film and resist, 3-5 days | None: a digital file only |
| Tooling cost | USD 180-450 for a stamp die, more for a hardened steel die | Low, usually absorbed into the setup | None |
| Per-piece cost | USD 0.08-0.20 for the striking operation | USD 0.10-0.25 for the etch and resist | USD 0.05-0.12, and it can be varied per batch |
| Sampling window | 6-10 working days, or 12-15 where the die is new | 6-10 working days | 6-10 working days |
| Bulk window | 35-50 days from the approved sample | 35-50 days | 35-50 days |
| Best for | A house signature that must last the life of the programme | A fine monogram or a repeating pattern | Batch codes and market-specific marks |
Plan the die before the sampling window opens rather than inside it. A hardened steel die at 15-22 days does not fit inside a 6-10 working days of sampling window, and discovering that in week two costs the season a month.
Protecting the Design
A die is a physical asset that embodies the mark, and two written decisions about it prevent most later disagreements.
- Agree in writing who owns the die, and on what terms it may be used for another client's work: the answer should be that it may not.
- Agree what happens to the die between seasons, including how long it is held and who pays to refurbish it.
- Register the mark before the fitting is photographed, since a mark in public use is harder to protect afterwards.
- Keep the tool drawing as well as the finished die, so a lost tool can be remade without a reverse-engineering exercise.
- Record the finishing standard alongside the die, because the same mark in two finishes reads as two different houses.
The ownership line is the one that matters commercially. A die paid for by the house and held at the fitting maker is normal; a die that may be run for someone else is not, and that clause is worth reading twice.
How the Logo Is Approved
Approval is a physical comparison against a sealed reference, not a photograph on a screen.
- Pull three pieces from the first shots of the die and inspect them under raking light at 45 degrees.
- Measure the relief depth and confirm it sits within the stated band for the route chosen.
- Confirm placement against the datum at ±0.30 mm and rotation at ±1 degree, on the assembled fitting.
- Plate the three pieces and approve the artwork again afterwards, since plating softens shallow relief.
- Seal one approved piece as the reference and keep a second on the line for comparison during the run.
Raking light is not a nicety. A relief viewed flat-on looks identical at 0.10 mm and at 0.45 mm; viewed at 45 degrees the difference is obvious, and that is the view a customer will have.
Common Faults and Their Causes
Five faults account for most rejected branded fittings, and each has a single cause that is preventable at the drawing stage.
| Fault | Cause | Prevention |
|---|---|---|
| Fine strokes disappear | Stroke width below the minimum for the route | Redraw to 0.20 mm for struck, 0.30 mm for cast |
| Letters merge together | Tight tracking inherited from the flat artwork | Widen the spacing beyond the brand guideline figure |
| Mark softens after plating | Relief too shallow for the layer applied over it | Use struck relief of 0.30 mm or more where plating follows |
| Relief rounds off during the run | Internal corner radius below 0.20 mm chipping the die | Radius every internal corner and inspect the first hundred shots |
| Mark sits crooked on the bag | No datum named on the drawing | Name the datum and hold placement to ±0.30 mm |
Our programme runs export experience since 2014 across 7 production lines with about 200,000 pcs per month of capacity, delivered through our validated partner factory Quanzhou Yingming Bags, an SGS-validated site, with inspection at AQL 2.5 (ISO 2859-1) and handover on FOB Xiamen terms.
Have your logo assessed for metal before the die is cut
Send the artwork, the fitting it goes on and the markets you sell into. We will return the route, the depth and stroke figures, the tooling time and a piece price at 500 pcs. Request a quote.
Frequently Asked Questions
What is the best way to put a logo on handbag hardware?
Struck from a hardened steel die, for a signature that must last the life of the programme. It gives a relief of 0.30-0.60 mm with crisp arrises and survives plating. Cast relief is deeper at up to 0.80 mm and suits a new form; laser is shallow and suits codes rather than identity.
How deep should a logo be on a metal fitting?
Between 0.30 and 0.60 mm for a struck mark, with 0.45 mm a good default on a lock face. Cast relief can reach 0.80 mm. Etching runs at 0.10-0.20 mm and laser marking at 0.02-0.05 mm, which is too shallow to survive plating well.
What is the minimum stroke width for a logo in metal?
0.15 mm for laser marking, 0.20 mm for a struck die and 0.30 mm for cast. Below those figures the finest stroke either fills in or breaks up. Most artwork prepared for print needs a redraw before it will meet any of them.
How small can lettering be on a bag fitting?
A capital of 1.5 mm is legible at arm's length, and 2.0 mm is preferred at the centre of a lock face. A lock face of 18 x 12 mm carries three to five letters comfortably; beyond that the letters must shrink below the legible height.
How long does logo tooling take?
A brass stamp die takes 8-12 days and a hardened steel die 15-22 days. That does not fit inside a sampling window of 6-10 working days, so the die should be commissioned before sampling opens rather than during it.
How much does a logo die cost?
A stamp die commonly runs USD 180-450, with a hardened steel die more. The per-piece cost of the striking operation is USD 0.08-0.20, and laser marking runs USD 0.05-0.12 with no tooling at all.
Who owns the logo die?
The house should, and that belongs in writing before the die is cut. The clause worth reading twice is the one on reuse: a die paid for by the house and held at the fitting maker is normal, but a die that may be run for another client is not.
Why does my logo look soft after plating?
Because the relief was too shallow for the layer applied over it. A plated layer of a few micrometres will not fill a struck relief of 0.45 mm, but it noticeably softens an etch at 0.10 mm. Approve the artwork after plating, not before.
Where should the logo go on a handbag?
The face of a twist lock, which the hand reaches for every time, is the highest-value position. A front panel plate competes with the leather and needs deeper relief. Avoid the base and the feet, which abrade the mark away within a season.
What placement tolerance should be specified?
±0.30 mm from a named datum, with rotation held to ±1 degree, measured on the assembled fitting rather than on the part alone. Without a named datum the mark can sit straight on the fitting and crooked on the bag.
Can a laser mark be used as the brand signature?
It can, but it is not advisable. At 0.02-0.05 mm it sits at or below the thickness of a plated layer and it wears off under handling. Laser is the right route for a batch code or a market-specific mark, not for the house identity.
How should a branded fitting be approved?
Pull three pieces from the first shots, inspect them under raking light at 45 degrees, measure the relief, confirm placement against the datum, then plate them and approve again. Seal one piece as the reference and keep a second on the line.
People Also Ask
What is the most durable logo method for bag hardware?
Struck from a hardened steel die, at 0.30-0.60 mm of relief. It has crisp arrises, survives plating and outlasts the bag. Cast relief is deeper but needs a new tool; laser is shallow and best kept for codes.
Why does my artwork not work as a metal logo?
Almost always stroke width. A hairline that reads on a screen is below 0.20 mm and disappears in metal. The fix is a redraw with wider strokes and wider letter spacing than the brand guidelines specify.
Can I brand hardware at 500 pieces?
Yes. 500 pcs per style and colourway is the working start for a branded fitting, and it covers the tooling amortisation on a stamp die comfortably. Below that figure a laser mark is the only route that makes sense.
Should the logo appear more than once on a bag?
Usually not. Two marks on one silhouette double the tooling and read as insecurity. One mark in the highest-value position, the face of the lock, does more for recognition than three marks in marginal ones.
Does plating change how a logo looks?
Yes, and most at shallow depths. A layer of a few micrometres visibly softens an etch at 0.10 mm and barely touches a struck relief at 0.45 mm. This is why approval happens after plating rather than on the raw fitting.
Sources and further reading
Every figure on this page is either our own programme data or attributed below. Open the originals before you write them into a specification.
- ISO — International Organization for StandardizationISO Publisher of the dimensional and geometrical tolerancing standards behind the placement and relief figures used on hardware drawings.
- ASTM InternationalASTM International Publisher of test practices for plating thickness and adhesion, referenced when branded relief is approved after plating.
- WIPOWorld Intellectual Property Organization The international registry for trade marks, the step to complete before a branded fitting is photographed or shown publicly.
- ECHA — REACHEuropean Chemicals Agency Administrator of REACH Annex XVII, including the nickel release limit of 0.2 µg/cm²/week that applies to branded plated fittings.
- Sourcing JournalSourcing Journal Trade reporting on branded hardware, tooling practice and design protection across the accessories industry.