Luxury Handbag Gluing and Assembly Explained: 6-9 Grams and Four Windows
Luxury handbag gluing and assembly is governed by four windows: how much adhesive goes on, how long it stays open, how hard the bond is pressed, and how long it cures. A structured body uses 6-9 g of adhesive, applied in a 3-4 mm line, opened for 3-5 minutes, pressed at 3-4 bar for 10-15 seconds and cured for 72 hours before it is tested. Miss any window and the bond fails late rather than early.
The Assembly Sequence, Priced in Minutes and Grams
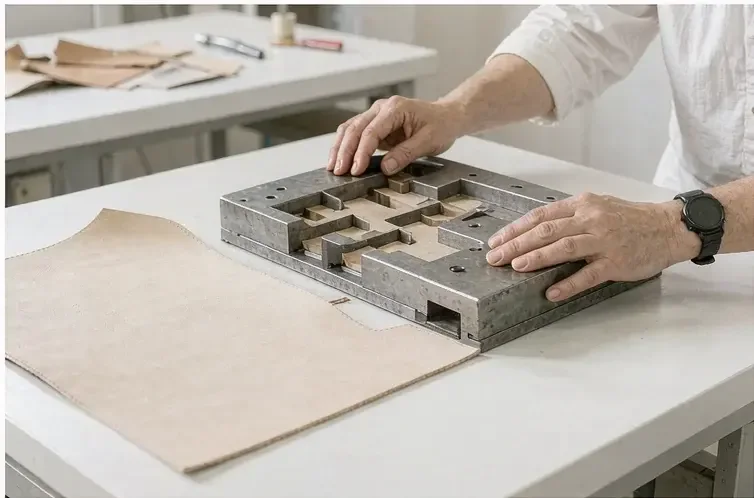
Assembly begins where cutting ends and it is best understood as a sequence of windows rather than as a list of steps. A structured body consumes 6-9 g of adhesive across roughly nine bonded joints, and the adhesive itself costs very little. What costs money is the waiting: 3-5 minutes of open time per joint, 10-15 seconds of pressing, and then a cure that runs for 24 hours before the piece is loaded and 72 before anyone can honestly test the bond.
- Adhesive per structured body
- 6-9 g across about nine joints
- Glue line width
- 3-4 mm, set back from the fold line
- Open time, contact cement
- 3-5 minutes to touch-dry
- Pressing
- 3-4 bar for 10-15 seconds per joint
- Cure before loading
- 24 hours at 20-22 C
- Cure before peel testing
- 72 hours, targeting 20-30 N per 25 mm
The nine joints are worth naming because they are where the adhesive actually goes: two gusset-to-face bonds, the base seam, the facing turn, both handle joins, the closure reinforcement, the base board and the pocket anchors. Each takes a different quantity and each has a different consequence if it fails, which is why the 6-9 g figure should be written per joint rather than per piece.
Adhesive Families and What Each Is For
Four families cover almost all luxury work, and choosing between them is a matter of what the joint has to survive. Water-based contact cement is the general-purpose choice for leather-to-leather bonds and is what most of the 6-9 g is. Solvent-based cement grabs faster and is used where a joint cannot be held in a jig. Heat-activated film is used where a bond must be repositioned before it sets. PVA is reserved for board and reinforcement rather than for leather itself.
| Family | Open time | Use it for | Avoid it for |
|---|---|---|---|
| Water-based contact cement | 3-5 minutes | Leather-to-leather bonds throughout the body | Joints that cannot be jigged or clamped |
| Solvent-based cement | 60-90 seconds | Quick grab where the joint cannot be held | Visible faces, because it can bloom on the grain |
| Heat-activated film | Reactivates at 60-70 C | Bonds needing repositioning before set | Load-bearing joins without a heat press |
| PVA | 5-8 minutes | Board, reinforcement and lining anchoring | Leather-to-leather, where it stays flexible and creeps |
Open Time: The Window That Decides the Sequence
Open time is the interval between applying the adhesive and closing the joint, and for a water-based contact cement it is 3-5 minutes — long enough for the carrier to leave and short enough that the surface is still receptive. Close too early and the carrier is trapped, and the bond stays soft for days. Close too late and the surface has skinned and the joint will not key, which produces a bond that holds until the first load and then peels.
The practical consequence is that open time sets the shape of the working day. Nine joints at 3-5 minutes each cannot be done one after another on a single body; they are interleaved across the six bodies held on a bench so that something is always in a window. A bench that looks idle is usually a bench waiting on chemistry, and a schedule that treats that waiting as slack will produce soft bonds rather than a shorter run.
Temperature is the variable most often omitted from the specification and the one most likely to change the result between seasons. Open time shortens as the room warms: a cement that gives 3-5 minutes at 20-22 C may give 2-3 at 28, and the same bench working to the same habit will start closing joints too early without anybody changing anything. A house that logs bench temperature alongside open time can explain a cluster of soft bonds in a single afternoon; one that does not will spend a week re-testing adhesive that was never the problem.
Glue Line Width and the Squeeze Test
Adhesive goes on in a 3-4 mm line, set back from the fold so that pressure pushes it into the joint rather than out of it. The squeeze test is simply this: after pressing, there should be nothing readable on either face. Squeeze that reaches the surface is not cosmetic — it stains the grain, it collects dust along the seam, and it is the first thing an inspector notices because it catches light differently from the leather around it.
- Apply in a 3-4 mm line, set back 1 mm from the fold line.
- Press from the centre of the joint outward, so excess travels away from the visible face.
- Wipe any squeeze immediately with the solvent the adhesive specifies, never with water.
- Check both faces at 10x after pressing; a stain at this stage cannot be removed later.
Pressure, Dwell and the Bond That Follows
Pressure is what converts an adhesive film into a bond, and the working figures are 3-4 bar for 10-15 seconds per joint on a roller or a press. Too little pressure leaves the film proud and the bond weak at the edges; too much forces adhesive out of the joint and starves it. The window is narrow enough that it should be written on the specification, and it is the variable most often left to whoever is holding the piece.
Under-pressed
The film stays proud of the surface and the bond is weak at the edges first, which is where peel starts. The joint looks closed and opens from the perimeter inward over the following weeks.
Correctly pressed
3-4 bar for 10-15 seconds, worked from the centre outward. The film is drawn into the fibre, no squeeze reaches either face, and the joint reaches 20-30 N per 25 mm at 72 hours.
Over-pressed
Adhesive is forced out of the joint and starved of material. The bond reads dry and brittle, cracks when the panel flexes, and fails in a straight line rather than at an edge.
Cure: 24 Hours Before Load, 72 Before Testing
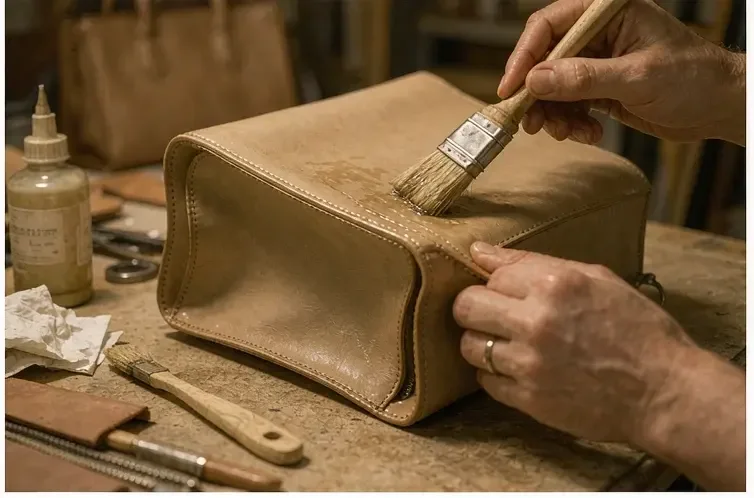
Cure is where most assembly faults are created, because it is the window with the least visible activity. Twenty-four hours at 20-22 C before the piece carries any load, and 72 hours before a peel test means anything. A body packed and shipped at 36 hours can pass every visual check and still arrive with bonds that have not reached strength, which is why a despatch date should be measured from material release rather than from the last bench operation.
Peel strength is the number worth specifying: 20-30 N per 25 mm measured at 72 hours on a representative sample. Below about 20 N the joint is under-bonded and will open at an edge; above 30 N it is usually over-bonded and brittle. Both look identical on the bench, and only the test separates them, which is why the test belongs at material release and at each new adhesive batch.
Where Adhesive Should Not Be Used
Adhesive is a positioning aid and a load sharer, not a structural fix. A handle join should be sewn as well as bonded, because adhesive alone creeps under sustained load and the handle slowly drops. A base corner should be reinforced as well as bonded. And no joint that a customer can see the edge of should rely on adhesive alone, because a bond that fails at a visible edge cannot be repaired without a mark.
Any joint carrying sustained load is sewn and bonded, never bonded alone. Adhesive creeps; thread does not. A handle bonded without stitching will drop visibly within a season.
Failure Modes and What Each One Points To
Four failure modes cover almost everything, and each points at a specific window rather than at the adhesive in general. A bond that opens from the edge inward was under-pressed. A bond that peels cleanly in one movement was closed too late. A bond that stays soft for days was closed too early and trapped carrier. A bond that cracks in a straight line was over-pressed and starved. Reading the failure tells you which window to correct, which is why failed samples should be kept rather than discarded.
Skiving quality sits upstream of all four failure modes and is worth ruling out first when a cluster appears. A panel skived to a residual of 0.9-1.0 mm presents a uniform surface for the film; one left at 1.4 mm gives a step at the joint that the roller bridges rather than presses, so the bond is strong in the middle and absent at the step. The symptom looks exactly like under-pressing, which is why the failed piece should be opened and the skive measured before the press figures are changed.
Assembly in one line
- Assembly is four windows — quantity, open time, pressure, cure — and every bond failure can be traced to exactly one of them. Keep the failed piece and it will tell you which.
How to Specify Adhesion on a Drawing
Adhesion is specified by naming the family, the line width, the open time, the press figures and the peel target. 'Bonded and stitched at the handle join, water-based contact cement in a 3-4 mm line, 3-5 minutes open, pressed 3-4 bar for 10-15 seconds, 20-30 N per 25 mm at 72 hours' is enforceable. 'Securely bonded' is not, and it is the phrase beneath which the widest variation in practice is found.
One further line is worth adding, and it is about compliance rather than strength. Adhesives and finishes placed on the European market are screened against REACH Annex XVII, and hardware coatings and dyes alongside them, so a material declaration is requested at the same time as the peel report. Asking for both together costs one email and avoids a second round of sampling later in the season.
The last item on the specification is the one that decides whether any of the others can be checked: a retained bonded reference. A joint made at the start of the run, pressed and cured under the same windows and kept on the shelf, gives an inspector something physical to compare against when a question arises in week four. Without it, every bond dispute becomes an argument about recollection, and recollections of a press setting are generous in the direction of the person doing the pressing.
Programme Figures
Our programme runs through our validated partner factory Quanzhou Yingming Bags, an SGS-validated site with 7 production lines and roughly 200,000 pcs per month of capacity, holding export experience since 2014. Sampling takes 6-10 working days, or 12-15 on a complex build; bulk occupies 35-50 days; minimums sit at 500 pcs per style and colourway; and shipments leave FOB Xiamen with FOB, CIF and DDP terms all available. Inspection is drawn at AQL 2.5 under ISO 2859-1, with finish adhesion tested against ISO 11644 and leather against ISO 3376. Material declarations are covered on luxury materials.
Have your bonds specified, not assumed
Send the silhouette, hardware direction, quantity per colourway and the joints you are unsure about. You will receive an adhesion specification with all four windows written in. Request a quote.
Frequently Asked Questions
How much adhesive does a luxury handbag use?
About 6-9 g across roughly nine bonded joints on a structured body: two gusset-to-face bonds, the base seam, the facing turn, both handle joins, the closure reinforcement, the base board and the pocket anchors. The figure should be written per joint rather than per piece.
What is open time and why does it matter?
It is the interval between applying adhesive and closing the joint, 3-5 minutes for water-based contact cement. Closing too early traps carrier and the bond stays soft for days; closing too late lets the surface skin and the joint will not key.
How wide should a glue line be?
Three to four millimetres, set back about 1 mm from the fold line so pressure pushes adhesive into the joint rather than out of it. Any squeeze reaching a visible face stains the grain and collects dust along the seam.
How hard should a bonded joint be pressed?
About 3-4 bar for 10-15 seconds, worked from the centre of the joint outward. Too little pressure leaves the film proud and weak at the edges; too much starves the joint of adhesive and produces a brittle bond.
How long does adhesive take to cure?
Twenty-four hours at 20-22 C before the piece carries any load, and 72 hours before a peel test means anything. A body shipped at 36 hours can pass every visual check and still arrive with bonds below strength.
What peel strength should a bonded joint reach?
Between 20 and 30 N per 25 mm measured at 72 hours on a representative sample. Below about 20 N the joint is under-bonded and opens at an edge; above 30 N it is usually over-bonded and brittle. Both look identical on the bench.
Which adhesive suits which joint?
Water-based contact cement for general leather-to-leather work; solvent-based cement where a joint cannot be jigged; heat-activated film at 60-70 C where repositioning is needed before set; and PVA for board and reinforcement rather than for leather.
Should a handle join be glued or stitched?
Both. Adhesive creeps under sustained load, so a handle bonded without stitching will drop visibly within a season. The rule is that any joint carrying sustained load is sewn and bonded, never bonded alone.
What does a bond failure tell you?
It identifies the window that was missed. Opening from the edge inward means under-pressed; peeling cleanly in one movement means closed too late; staying soft for days means closed too early; cracking in a straight line means over-pressed.
Why does a bench sometimes look idle?
Because it is waiting on chemistry. Nine joints at 3-5 minutes of open time each cannot run consecutively on one body, so they are interleaved across the six bodies held on the bench. Treating that waiting as slack produces soft bonds.
How should adhesion be written on a drawing?
By naming the family, line width, open time, press figures and peel target together: water-based contact cement, 3-4 mm line, 3-5 minutes open, 3-4 bar for 10-15 seconds, 20-30 N per 25 mm at 72 hours. That is enforceable; 'securely bonded' is not.
How long does sampling and bulk take?
Sampling takes 6-10 working days, or 12-15 on a complex build, and bulk occupies 35-50 days at 500 pcs per style and colourway. Shipments leave FOB Xiamen, with FOB, CIF and DDP terms all available.
People Also Ask
Is glue a sign of lower quality on a luxury bag?
No. Every structured body uses adhesive as a positioning aid and load sharer. Quality shows in whether the joint is also sewn where load is sustained, and whether the four windows were held.
Why does a bonded edge open after a few weeks?
Usually under-pressing. The film stayed proud of the surface, the bond is weakest at the perimeter, and peel begins there and works inward long after the piece left the bench.
Can adhesive be changed without re-sampling?
Not without testing. A new family or a new batch changes open time and cure, so the 72-hour peel test should be repeated at each change rather than assumed from the previous result.
What causes white bloom near a seam?
Usually solvent-based cement used near a visible face, or squeeze wiped with the wrong solvent. Both leave a deposit on the grain that catches light differently from the leather around it.
How do you check a bond without destroying the piece?
Look for squeeze at 10x, press a fingernail along the seam to feel for a soft film beneath the surface, and test peel on a separate representative sample rather than on a finished piece.
Sources and further reading
Every figure on this page is either our own programme data or attributed below. Open the originals before you write them into a specification.
- ISO — International Organization for StandardizationISO Publisher of ISO 2859-1 for the AQL 2.5 inspection plan, ISO 11644 for finish adhesion and ISO 3376 for tensile strength.
- European Chemicals AgencyECHA Regulator for REACH, whose Annex XVII restrictions apply to the adhesives, solvents and finishes used in assembly.
- SATRA Technology CentreSATRA Independent testing body for leather goods, referenced for peel strength, bond durability and flex test methods.
- Leather Working GroupLeather Working Group Tannery audit protocol evidencing hide traceability behind the leather used in bonded and stitched joints.