How Luxury Handbag Straps Are Reinforced: Seven Decisions in Order
How are luxury handbag straps reinforced? Decide in seven steps and never out of order: the load the strap carries, how its root leaves the body, what core sits inside it, how the fold and the ring are backed, the stitch pattern at the root, the metal interface, and the pull test before release. A shoulder strap carrying a full body is worked at 2.0-2.4 mm finished, with a 0.8 mm core and a patch behind the root. This guide walks the seven in order.
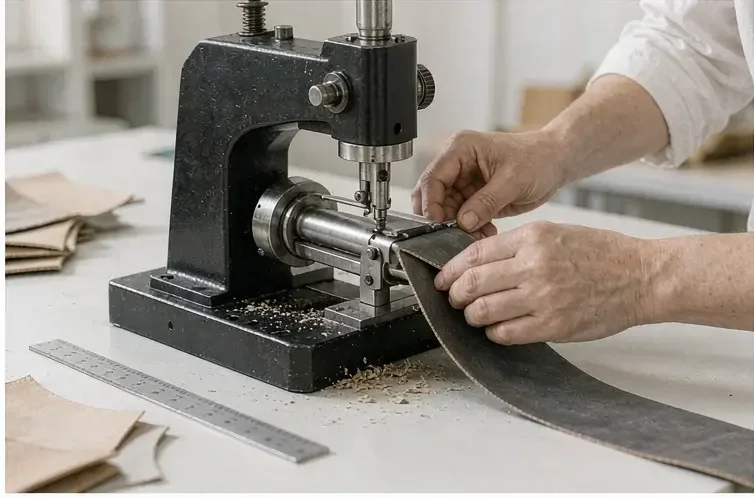
Decision One: How Much Load Does This Strap Actually Carry?
Load comes first because everything else follows from it. A short top handle carries the body and little else. A shoulder strap carries the body plus the contents plus the dynamic shock of walking, which is a multiple of the static weight. A crossbody strap adds swing. Name the load before naming the construction, because a strap built for a display body will fail on a body that is actually carried.
The practical translation is substance and width. A decorative strap that never carries weight can be a single layer at 1.2-1.4 mm. A shoulder strap on a body meant to be used is worked at 2.0-2.4 mm finished, usually as two layers with a core between them. Between those two numbers lies the whole of strap engineering, and choosing the lower one to save material is the most common strap failure there is.
- Decorative strap
- Single layer, 1.2-1.4 mm, no core
- Light shoulder strap
- Two layers, 1.6-2.0 mm finished, light core
- Full shoulder strap
- Two layers with a 0.8 mm core, 2.0-2.4 mm finished
- Root reinforcement
- Patch at 1.2 mm, or a second leather layer of the same substance
- Skiving at the fold
- Edges reduced to around 0.6 mm so the fold lies flat
- Stitch at the root
- 8-9 stitches per inch, 0.45 mm thread, boxed and cross-stitched
- Metal interface
- D-ring wire around 3.5 mm, rivet flange around 8 mm
- Pull test
- Defined load, commonly 10-15 kg for a shoulder strap, held for a set duration
Decision Two: How the Root Leaves the Body
The root is where straps fail, and it fails because the load concentrates at the point where the strap stops being a strap and becomes part of the body. Three attachments are available: a root sewn into a seam, a root riveted to a panel, and a root that continues into the body as a single piece. Each carries load differently and each needs a different reinforcement.
Sewn into a seam
The root is captured in the seam allowance of the body. Clean and invisible, and entirely dependent on the reinforcement behind the seam.
Riveted to a panel
The root is fixed with a rivet through a patch. Strong and visible, and it needs a flange wide enough to spread the load into the panel.
Continuous into the body
The strap and the panel are one piece of leather. The strongest option, and the one that consumes the most material.
Sewn with a backing plate
A plate inside the body spreads the load across a wider area. Common on a heavy body and invisible from outside.
Whichever is chosen, the rule is the same: the load has to be spread into the body rather than concentrated at a line. A patch at 1.2 mm, or a second leather layer of the same substance, sits behind the root and does that work. It is invisible in the finished article, which is precisely why it is the first thing dropped when a drawing is rushed.
Decision Three: What Goes Inside the Strap
A strap two layers thick is only as good as what sits between them. A core gives the strap body without making it stiff, prevents it rolling under load and stops it stretching over time. A 0.8 mm core is typical on a full shoulder strap. Alternatives include a woven tape, used where stretch resistance matters more than softness, and a thin foam, used where the strap is wide and needs to sit comfortably.
The core is also where the strap's character is set. A leather core gives a firm, expensive-feeling strap that breaks in slowly. A woven tape gives a strap that stays exactly the same width for years. Neither is better; the choice belongs to the design and should be made at sampling rather than discovered in bulk, because a strap that rolls is noticed every single time the bag is worn.
Decision Four: Backing the Fold and the Ring
Every strap has at least one fold, where it turns through a ring or returns on itself, and that fold is the second place straps fail. The leather is bent around metal, the outer face is stretched, and the stitch line sits exactly where the abrasion happens. The mitigation is threefold: skive the fold to around 0.6 mm, back it with a second layer, and set the stitch line back from the metal so the thread is not rubbed by it.
- Skive the fold to around 0.6 mm so the two layers lie flat rather than bulky.
- Back the fold with a second layer of the same substance.
- Set the stitch line back from the metal so the thread is not abraded by it.
- Keep the ring wire section generous, around 3.5 mm, so the fold radius stays open.
- Test the fold on an assembled body, not on a component card.
Decision Five: Stitch Pattern and Density at the Root
At 8-9 stitches per inch with 0.45 mm braided polyester, the root is boxed and cross-stitched so that load is carried by two independent lines rather than one. A single line of stitching across a root is the classic failure: one broken stitch, then progressive unravelling under load. Boxing and crossing costs a few seconds and removes the failure mode entirely.
Density deserves a caution. Going denser, to 10 or 11 per inch, looks finer and perforates the leather along the line, so the root tears at the perforations rather than at the thread. Going looser lets the root open under load. Eight to nine is not a tradition; it is the range where the thread and the leather fail at roughly the same load, which is what a joint should do.

Decision Six: The Metal Interface
Metal is harder than leather, so the interface is designed around the metal rather than the other way round. A D-ring wire of around 3.5 mm keeps the fold radius open; a thinner wire closes it and abrades the fold faster. A rivet flange of around 8 mm spreads the load into the panel; a smaller flange pulls through under load. Both are drawing decisions, and both are inexpensive to get right.
Plating matters here too, because the fold is a contact surface. Decorative gold at 0.15-0.3 µm wears through where the strap moves against the ring, and the underlayer shows as a dull line. Either specify a heavier stack at that surface or choose a harder route such as physical vapour deposition for the ring. It is a small addition and it prevents the most visible wear mark on a carried body.
Decision Seven: How the Strap Is Tested Before Release
A strap is tested by loading it rather than by looking at it. A defined load, commonly 10-15 kg for a shoulder strap, is applied and held for a set duration, and the root, the fold and the stitch line are inspected afterwards for movement, gap or elongation. It is a house specification rather than an ISO test, and it should be written as one so nobody mistakes it for a standard.
| Check | What it looks for | Where it is done |
|---|---|---|
| Static pull test | Root movement, stitch gap, elongation | On a sample body, before bulk release |
| Fold inspection | Cracking or whitening at the fold radius | After the pull test, on the same body |
| Stitch line check | Broken or skipped stitches at the root | Under magnification at the root |
| Hardware check | Ring deformation, plating wear at the contact face | On the assembled body after loading |
| Visual release | Overall alignment and edge condition | Final inspection at AQL 2.5, ISO 2859-1 |
The Build Sequence, in Order
Sequence matters because later steps close off earlier ones. Cut the strap to length with the grain or nap running along it. Skive the fold areas. Bond the core between the two layers. Close the strap with its edge stitch. Set the fold and stitch it back from the metal. Set the root last, against the reinforcement already in place, and box and cross it. Each step has to be complete before the next begins.
Seven decisions, in order
- Load first: decorative, light or full shoulder, and width follows it.
- Root attachment: sewn, riveted, continuous or backed, each with its own patch.
- Core: 0.8 mm leather, a woven tape or a thin foam, chosen for character.
- Fold: skive to 0.6 mm, back it, set the stitch back from the metal.
- Stitch: 8-9 per inch, 0.45 mm thread, boxed and crossed at the root.
- Metal: 3.5 mm wire, 8 mm flange, heavier plating where the strap rubs.
- Test: 10-15 kg held, then inspect root, fold and stitch line.
What Goes on the Drawing
A strap drawing needs the finished substance, the layer construction, the core, the skive dimensions, the reinforcement patch with its footprint, the ring and rivet sizes, the stitch pattern and density, and the test load. Nine lines. Without them the bench will build a strap that looks right and carries less than the body needs, and the difference will not appear until the bag is full.
Programme terms underneath are the usual ones: MOQ 500 pcs per style and colourway, sampling at 6-10 working days and 12-15 for a complex construction, bulk at 35-50 days on FOB Xiamen terms, inspection at AQL 2.5 under ISO 2859-1, with a base reference unit of USD 4.80 before material. Capacity runs across 7 production lines at about 200,000 pcs per month with export experience since 2014, delivered through our validated partner factory Quanzhou Yingming Bags.
Designing a strap that has to carry weight?
Send the silhouette, the intended load and the ring sizes. We will return a construction, a reinforcement drawing and a test load. Request a quotation
Frequently Asked Questions
What thickness should a luxury handbag strap be?
It follows the load. A decorative strap is a single layer at 1.2-1.4 mm. A light shoulder strap is two layers at 1.6-2.0 mm finished. A strap on a body that is actually carried is two layers with a 0.8 mm core, finished at 2.0-2.4 mm. Choosing the lower figure to save material is the most common strap failure.
Where do handbag straps fail first?
At the root, where the strap stops being a strap and becomes part of the body, because load concentrates there. The fold through a ring is second, where leather bends around metal and the stitch line sits exactly where the abrasion happens. Both are addressed by reinforcement rather than by a stronger leather.
What is a strap core and is it necessary?
A core is the material between the two leather layers. A 0.8 mm leather core is typical and gives the strap body without stiffness, stops it rolling and slows stretch. It is necessary on any strap carrying real load; a decorative strap can be a single layer without one.
How should a strap root be stitched?
Boxed and cross-stitched at 8-9 stitches per inch with 0.45 mm braided polyester, so two independent lines carry the load. A single line across a root fails progressively once one stitch breaks. Going denser perforates the leather and the root tears at the perforations instead.
Why does a strap fold crack at the ring?
Because the fold radius is tighter than the leather tolerates and the stitch line sits where the metal abrades it. Skive the fold to around 0.6 mm, back it with a second layer, set the stitch line back from the metal and keep the ring wire section generous, around 3.5 mm.
What size ring and rivet should a shoulder strap use?
A D-ring wire of around 3.5 mm keeps the fold radius open; thinner wire closes the fold and abrades it faster. A rivet flange of around 8 mm spreads the load into the panel; a smaller flange can pull through under load. Both are drawing decisions and both are inexpensive to get right.
Does plating thickness matter on a strap ring?
Yes, because the fold is a contact surface. Decorative gold at 0.15-0.3 µm wears through where the strap moves against the ring and the underlayer shows as a dull line. Specify a heavier stack on that surface or choose a harder route such as physical vapour deposition for the ring.
How is a strap tested before a bag is released?
By loading it. A defined load, commonly 10-15 kg for a shoulder strap, is applied and held for a set duration, then the root, the fold and the stitch line are inspected for movement, gap or elongation. It is a house specification rather than a standard, and it should be written as one.
Should a strap be cut with the grain running along it?
Yes. Leather has least stretch along the backbone and most across the belly, so a strap cut across the direction of greatest stretch will lengthen under load. On suede the same rule applies to the nap, which must run consistently along the strap and down the body.
Can a strap be part of the body rather than attached to it?
Yes, and it is the strongest option: the strap continues into the panel as one piece of leather, so there is no root joint to fail. It consumes more material, because the panel has to be cut wide enough to include the strap, and it suits a body where the strap is a design line.
What reinforcement belongs behind a riveted strap root?
A patch at 1.2 mm, or a second layer of the same leather, cut to the footprint of the rivet flange plus a margin all round. It spreads the load into the panel rather than letting the rivet work against a single thickness. Without it the flange eventually pulls through.
How long does a strap change add to sampling?
A strap revision usually sits inside the standard 6-10 working days, and it moves into the 12-15 working day band only when the root attachment itself changes, since that alters the panel and the sequence. Test the revised strap on an assembled and loaded body rather than on a component card.
Does a wider strap need more reinforcement?
Not necessarily more, but different. A wide strap distributes load across more leather, so the root can be slightly less heavily patched, while the core matters more because a wide strap is prone to rolling and cupping. Choose the core for width as well as for load.
What should the strap drawing specify?
Finished substance, layer construction, core, skive dimensions, reinforcement patch with its footprint, ring and rivet sizes, stitch pattern and density, and the test load. Nine lines, and each one prevents a decision being improvised at the bench under time pressure.
People Also Ask
How do you reinforce a handbag strap?
Work in order: load, root attachment, core, fold backing, stitch pattern, metal interface and pull test. A full shoulder strap is two layers with a 0.8 mm core finished at 2.0-2.4 mm and a patch behind the root.
What thickness should a bag strap be?
Decorative straps are a single layer at 1.2-1.4 mm. Light shoulder straps are 1.6-2.0 mm finished. Straps meant to carry a full body are 2.0-2.4 mm with a core.
Why does my bag strap stretch over time?
Usually a missing core or a strap cut across the direction of greatest stretch. A 0.8 mm core and cutting along the grain both limit elongation considerably.
How do you stop a strap cracking at the ring?
Skive the fold to around 0.6 mm, back it with a second layer, set the stitch line back from the metal and use a ring wire of around 3.5 mm so the fold radius stays open.
What stitch is used on a bag strap root?
Boxed and cross-stitched at 8-9 stitches per inch with 0.45 mm braided polyester, giving two independent lines so one broken stitch does not unravel the root.
Sources and further reading
Every figure on this page is either our own programme data or attributed below. Open the originals before you write them into a specification.
- SATRA — leather and materials testingSATRA Independent test house whose seam strength and abrasion methods inform the pull and fold checks described here.
- ISO — international standardsISO Publisher of ISO 3376 for tensile strength and ISO 2859-1 for the AQL 2.5 release inspection.
- ISO/TC 289 — Leather technical committeeISO Develops the ISO leather test methods relevant to strap substance, core and seam behaviour.
- ASTM — standardsASTM International Publisher of test practices commonly referenced when a strap fold and its plating are assessed together.